
DLSS 5 Neural Rendering
DLSS 5 Neural Rendering is NVIDIA’s next-generation renderer, and Unclaw supports it end to end. Everything needed ships inside the app except one NVIDIA early-access file — add that single file and the DLSS switch becomes a DLSS 5 switch.
What you need
Section titled “What you need”| Platform | Windows |
| GPU | An NVIDIA RTX card |
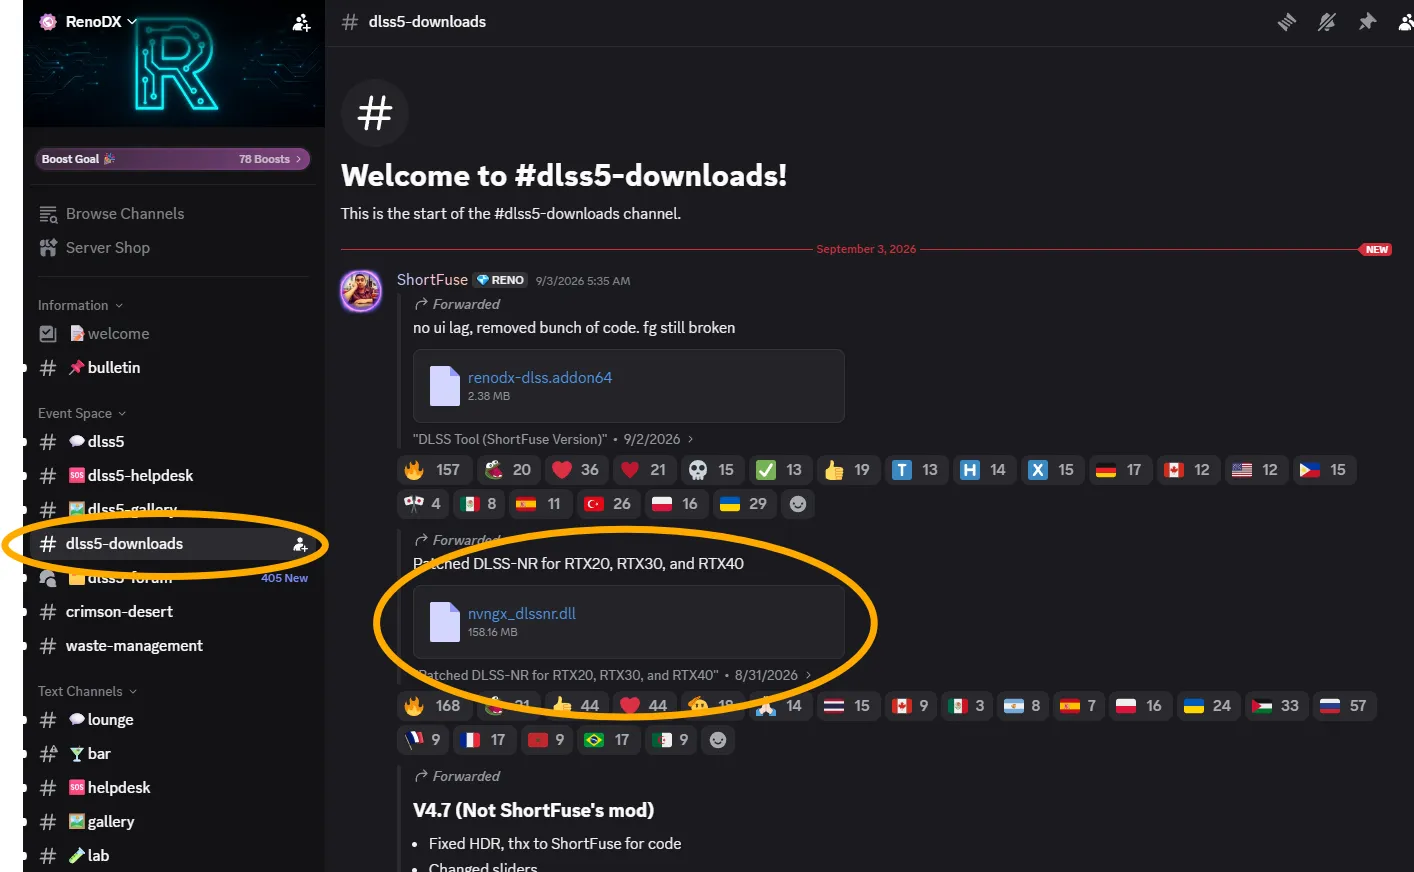
| The file | nvngx_dlssnr.dll — the Neural Rendering model, ~158 MB. From the RenoDX Discord, channel #dlss5-downloads |
Grab the file from the RenoDX Discord — the #dlss5-downloads channel. The community build labelled “Patched DLSS-NR for RTX20, RTX30, and RTX40” also runs on newer cards. It is NVIDIA’s early-access Neural Rendering model, which we can’t bundle in the installer.
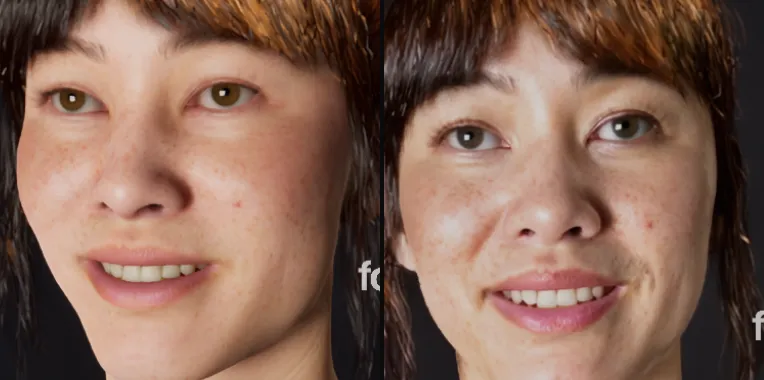
Here is the same character with Neural Rendering off (left) and on (right) — skin, lips and tone go from rendered to photographed:
Install it
Section titled “Install it”-
Join the RenoDX Discord and download
nvngx_dlssnr.dllfrom #dlss5-downloads (~158 MB). -
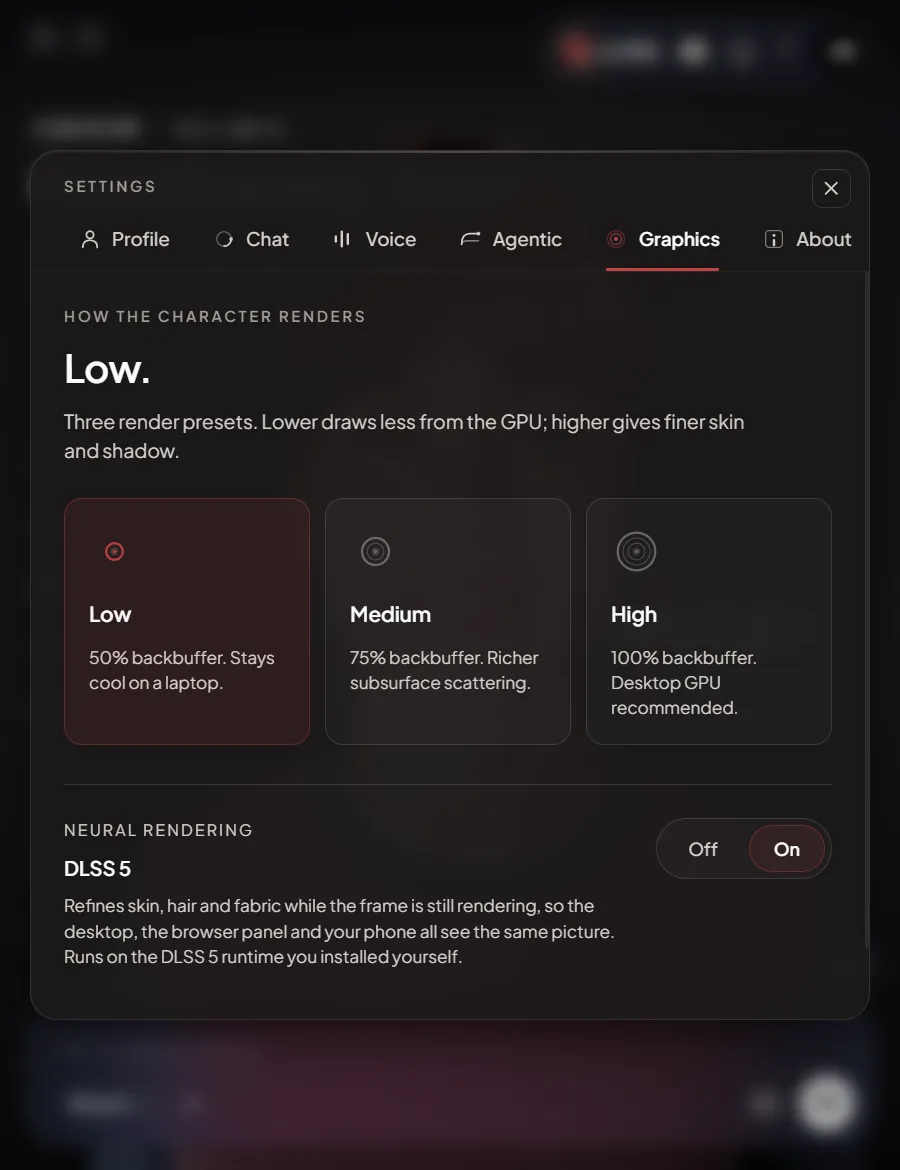
In Unclaw, open Settings → Graphics and click Install Neural Rendering.

-
Pick the downloaded file. Unclaw places it where the engine looks.
-
Restart the character.
That’s the whole process. Within about half a minute of the character appearing, the Upscaling row in Settings reads Neural rendering · DLSS 5 and shows it running:
Is it actually on?
Section titled “Is it actually on?”The switch reports what the renderer is really doing, not just what
you asked for. If it says “Switched on, but not currently running”,
restart the character — that clears it. If the Install Neural
Rendering button is still there after installing, the file wasn’t
picked up: make sure it is named exactly nvngx_dlssnr.dll and try the
Install button again.
Turning it off
Section titled “Turning it off”The same switch turns it off. To remove Neural Rendering entirely,
delete nvngx_dlssnr.dll from
%APPDATA%\unclaw\runtime\unreal\AudioTestProject02\Binaries\Win64 —
Unclaw falls back to regular DLSS on the next restart.